Forks and Pull Requests
Overview
Teaching: 5 min
Exercises: 10 minQuestions
How do I contribute to repositories I have not been given permission to modify?
Objectives
Fork a public repository
Create a pull request to the original repository
One of the strengths of open source software development is the ability to have many contributors helping with the project. However, if you gave every contributor access to the same repository, it would be too easy for either mistakes or malice to cause problems for the whole repository.
GitHub helps solve this problem by allowing people to fork their own copy of a project, work on it in their own space, and submit a pull request to the original project in order to contribute without having to share too many permissions.
Creating a fork
To create a fork of the repository we’ll be experimenting with, go to https://github.com/dlstrong/swc-forklesson, select the repository, and click on the ‘fork’ button:
For the demonstration’s sake, we can make all our edits through the web interface. However, when you’re developing your own projects, you’ll probably want a local working copy too. You can change to a directory that’s different from your previous project and clone the repository normally:
$ cd ~
$ mkdir forktest
$ cd forktest
$ git clone https://github.com/dlstrong/swc-forklesson.git
(Why you want to change directories: If you’re still in the same directory you were just working in, that’s where clone will put the new content too. The cloned project could get really entangled with what you were just working on!)
Make changes to the files in this repository the same way you would in any other. This is now your copy of the code, to do whatever you like with (within the bounds of the license agreement, as will be discussed later).
Contributing to a repo via pull request
Let’s add two contributions to the repository we just pulled from.
In the web interface, select the contributors.txt file and edit it to add your name to the list.

Also make a new file that has your name on it, i.e. yourname.txt.
You could now email the maintainer of the original repository to tell them about your updates, and they could use the unique hash identifier of your commit to pull those changes into their own code base, but GitHub makes the process much easier with Pull Requests.
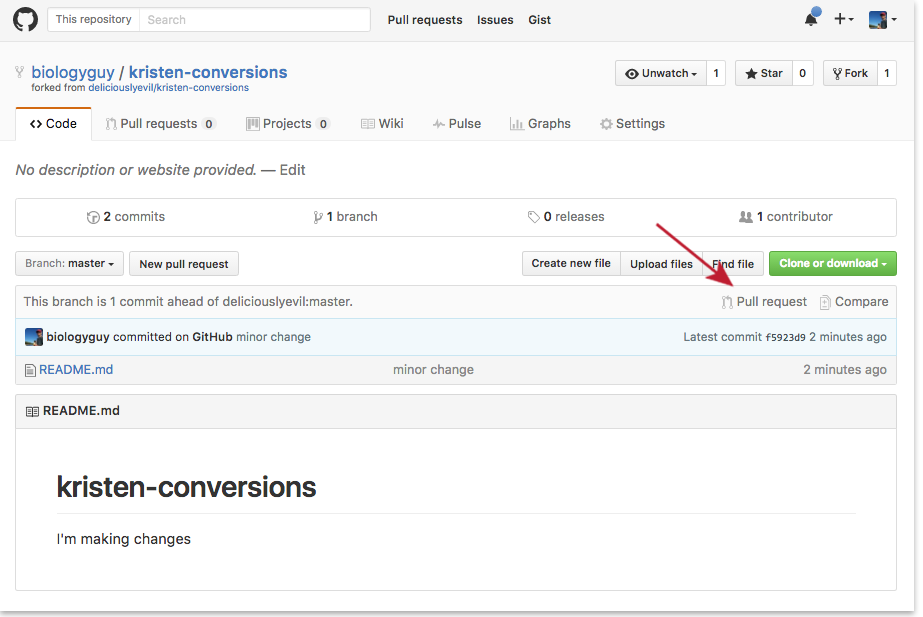
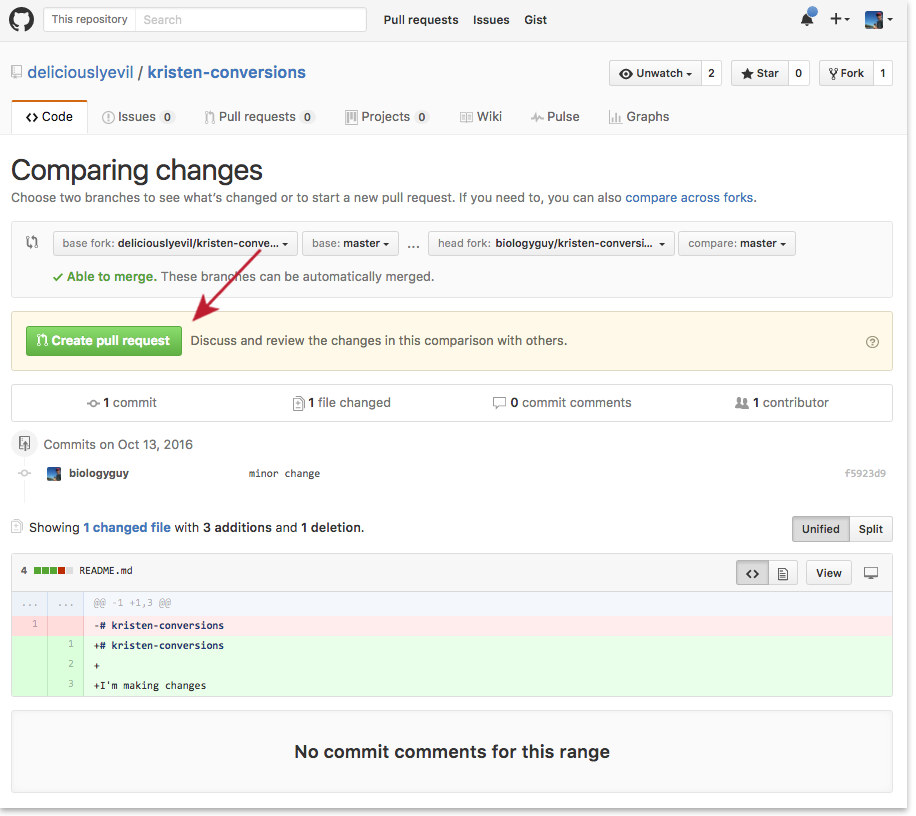
You’ll use the Base Fork and Head Fork buttons to choose what to send where. (If you don’t see those options, look for a link that says “If you need to, you can also compare across forks.”)
- Base fork: The place you want to add information TO is the base fork. (In this case, it’s the dlstrong version.)
- Head fork: The place you want to bring information FROM is the head fork. (In this case, it’s your version.)
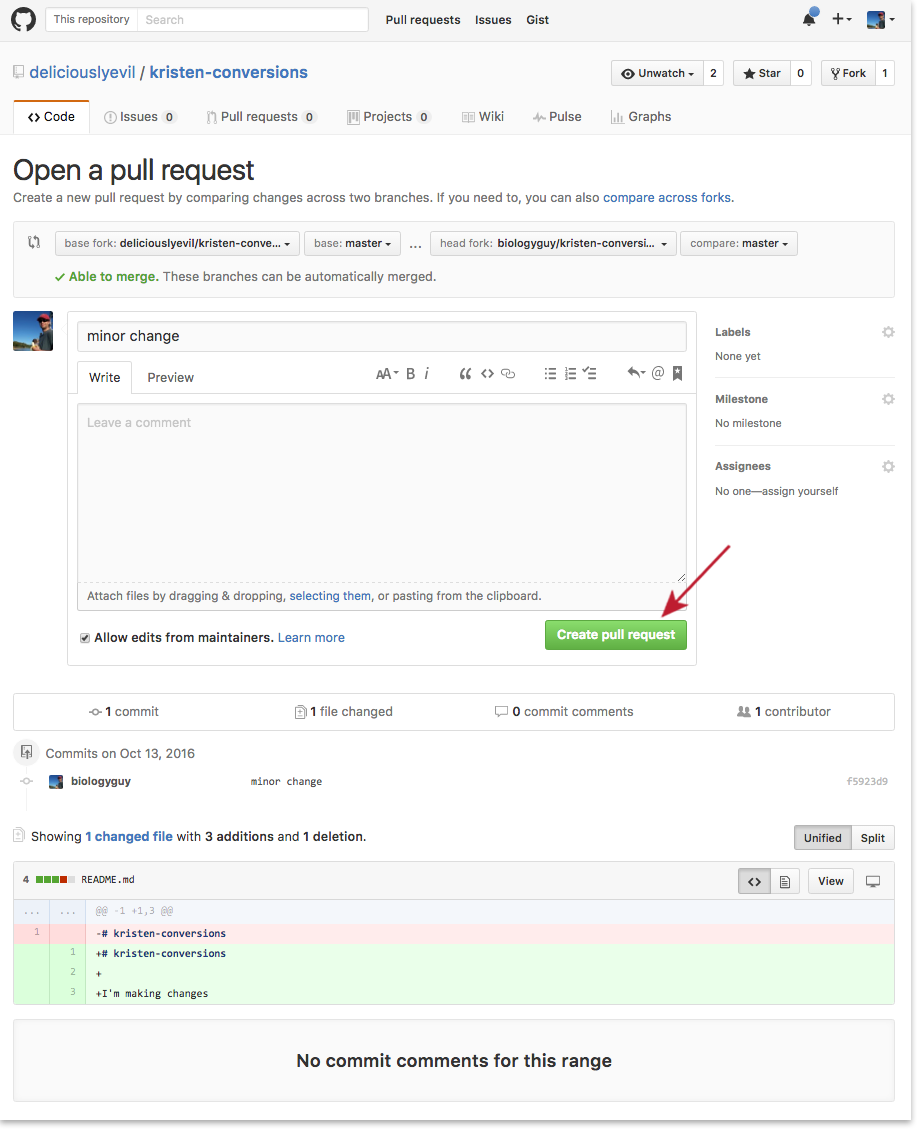
Compare the changes you want to add to your pull request and send it off.
(In the screen shots below, “deliciouslyevil” is the Dracula persona who’s the repository maintainer used in Software Carpentry examples, and “biologyguy” is the contributor who’s submitting Kristin’s edits to the central collection.)
Accepting a pull request
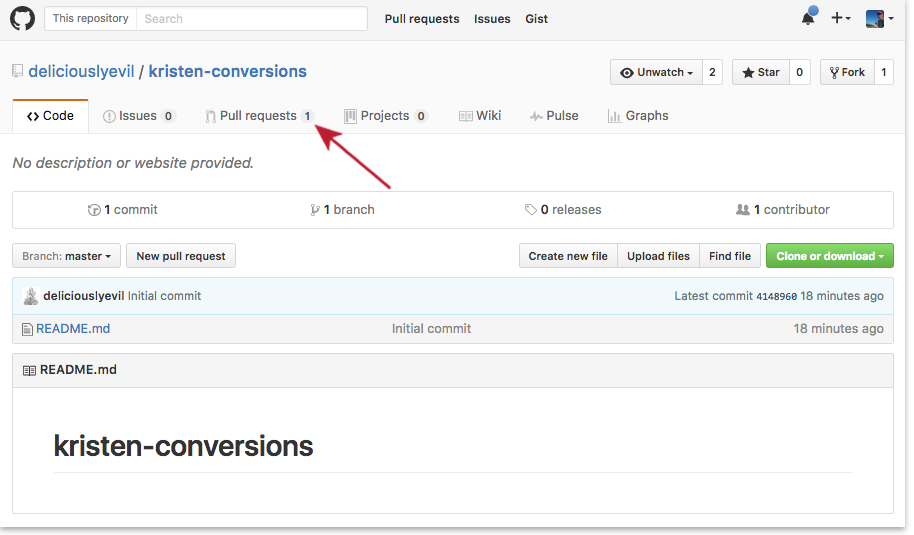
The maintainer will most likely get an email about the new pull request, but if they don’t, it will be visible to them next time the log into GitHub:
Accepting the request is as simple as hitting the green button, BUT BE
CAREFUL!. Always look at the cimmit history, and check what changes
are included in the pull request. You don’t want the merge to break
your code. Check the ‘Commits’ and ‘Files changed’ tabs to be sure.
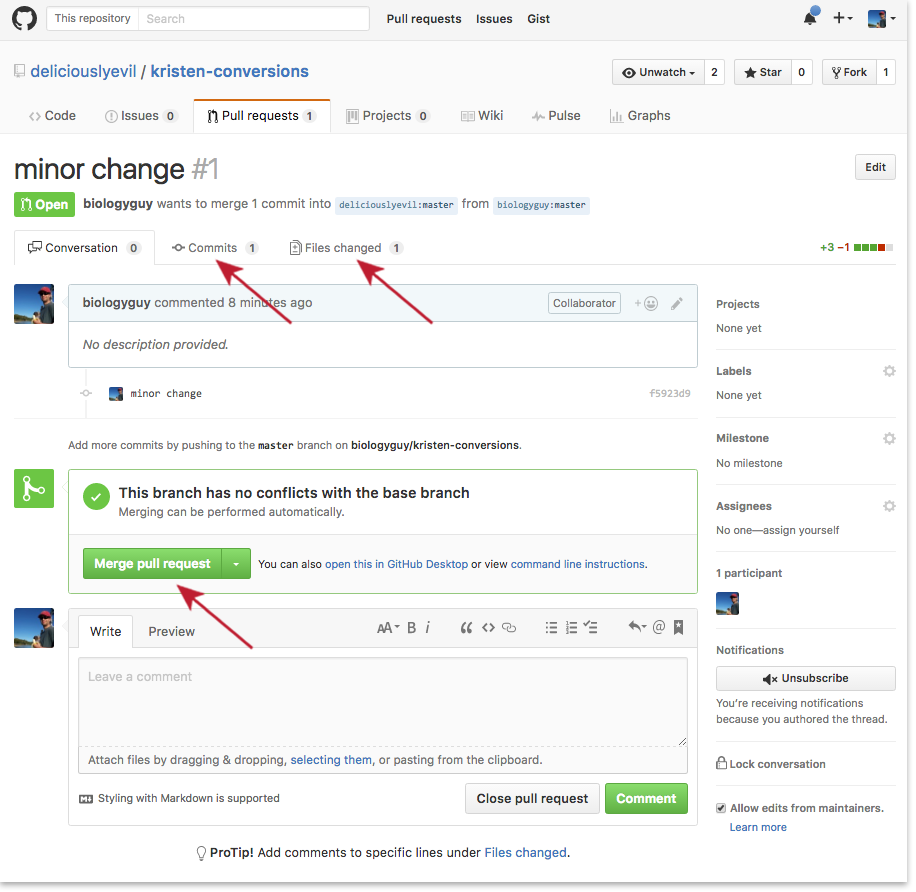
Be wary of the big green button
Try to think of some reasons you may want to reject a pull request.
Key Points
Any public repository on GitHub can be forked and modified.
If you make changes to a forked repository, you can request that the maintainer of the original repository merges your changes into theirs.